How to make a Raku Kiln
There are many commercially available Raku kilns, but they can also be made easily from inexpensive household bricks.
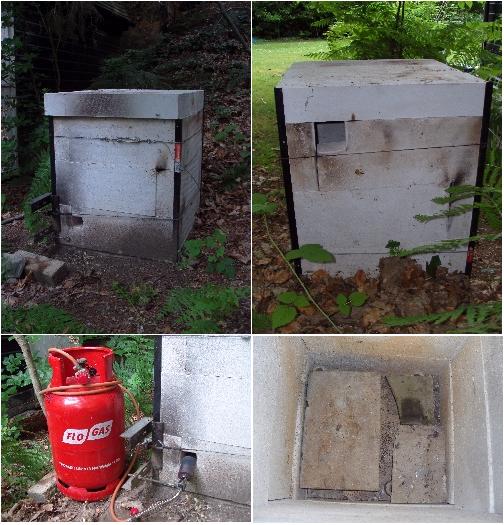
My kiln was made simply and quickly for about £25. While any housebricks could be used for construction, normal housebricks are much more dense than kiln insulating bricks and would take much longer to reach temperature. They are also more sensitive to thermal shock, and have relatively poor insulation properties. Lighter, sandy, more porous bricks are best suited for raku kiln design.
The bricks I used for my kiln are called Durox. They appear to be ideally suited as an inexpensive but enduring brick for raku firings. They can be easily sawn with a standard saw and don’t need mortar to hold the bricks together. I used angle iron to form the edges of the kiln, and thick wire around the periphery to help hold the walls together. I have fired my kiln about 30 times and have only had to replace the 3 roof bricks in that time. My kiln is kept outside and is only protected from the elements by a rubber sheet. The bricks become more porous with the firings and should be kept as dry as possible as they will break if fired when wet.
The kiln is fired with propane bottled gas using a bullfinch burner. I have a bracket (used to attach television aerials to chimneys) to help keep the burner in the correct position. My kiln reaches temperature (1000c) in about 1 hour from cold.